 Mobile
 Tower
Tower
 R24
R24
 Builder
 Manager
 Connect
 Kyno
Kyno
 Media Engine
 Remote Access
 Support
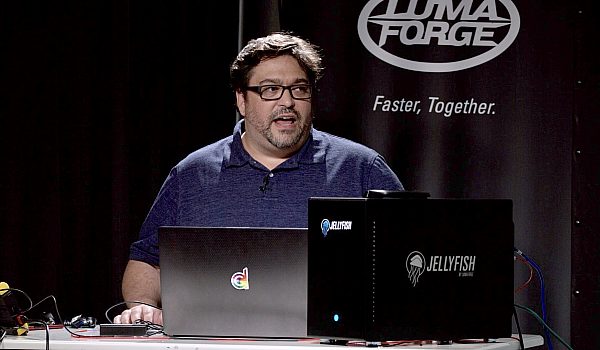
Tony Gallardo demonstrates how to use Resolve as a hub for VFX during your edit. Resolve Color Management makes it easy to bring all of your footage into the same color space and gamma before send off image sequences to Nuke or Fusion.
Um, so all right, we're going to get into resolve a crash course guide for RCM and resolve. So fun stuff. What is RCM? Well, it is a, they're color management. I'm not sure if you guys have ever heard of ACEs, anybody ever heard of ACEs? So it's very much in that same vein, that same mindset of ACEs, but just kind of simplifies things and keeps it locked and contained to resolve. So it's kinda nice. Um, ACEs is great if you're, you know, on a feature film and you're doing tons of vendors and B effects artists. Um, but if it's just like me, I'm a solo artist or I'm dealing with very minimal, um, vendors. Uh, RCM is pretty cool. So a real quick go over some benefits. Before that though, this is not a magic bullet. You know, it's not something that's just going to solve everything.
You've got to design and build a workflow, right? You've got to test your workflow, especially with VFX, you know, based on budget, based on time, based on your, your creative things will change, right? Things will adapt. So your VFX artists may just need progress or you may just need EXR. Today we're going to be jumping into a EXR with linear gamma, but you know, your workflow may not need that, but we're going to have fun doing that today. Anyways, some of the benefits I think of using RCM specifically for prepping VFX files are that you could, you can unify your color space. So Shane Herbert is a cinematographer's got a great expression about all the different, um, the digital cameras we have now. You know, they're there like digital film stocks, they kind of emulsify differently, they react to light differently and that's great for production.
But a four post, we kind of want to be able to unify things and know where we're playing and playing the same field, unify the gambles. So we're not, you know, all over the place. Um, it's adaptable. So what I mean by that is that you can work in one space, but you can kind of shift and, and export to a different one and resolve will help you transition all that color science right into that next space. Obviously you want to have the proper calibrated monitors and you know, and that sort of thing. And saving the best for last is, uh, you know, for me when I do my visual effects, I want to be able to provide either my artists or my colorist the best possible either dynamic range or color science that I can give. So I want to preserve that all the way through the pipeline and deliver it to them.
Either EXRs or a pro is in log C, whatever it is. But I want to preserve that as much as possible so that way the colors has as much capability to kind of push and pull that color around, um, without being mad at me. Um, so we're going to just assume that we've got all of our selects in and that, uh, we've got our XMLs in, we've done all of our cut lists and so we're just gonna kind of use these four shots here. But what we need to do is go into our settings tab and on our color science for our master project settings, we're gonna, we're going to change it from how resolve normally works and they give you a couple of options, but we're gonna jump right into color managed and that's going to activate the RCM. Then we're going to color management tab.
And so is you can see here on the top we've got input, color, space, timeline, color, space and output, color space. So we're telling what we want, how we want to import our footage, what we want it to be, and what we want to work in. Um, that's our timeline. So for your timeline, you can kind of choose much like how the digital cameras have their own, um, digital emulsion, if you will. You can actually grade in what you want to. So I like every color science, so I want to work in Eric log seat, right? But if you choose red log or Cindy on log, uh, it will actually change and adapt. So your tools, your color wheels, everything that you do will adapt to that. So it's kind of an interesting play and you should definitely explore, you know, trying different, different timeline, color spaces.
Um, I'm going to go ahead and select to separate the color space and gamma. So we're going to be an every color science, every log, and then I'm going to output or Eric Cola science and go to linear. So that's how we are. I want to work in every log on output linear from my VFX, then I can switch my output and go back to the game on 2.4 S RGB or stay in every log. So that's kind of the cool thing and the kind of the mindset of ACEs is that you can tell result what you want to come in, how you want to work and then have resolved, translate all that science for you out for your output. So let's go ahead and click save real quick on your, um, on your raw files. So like your red files or your Arie raw, you can, you can assign who your color space as like dragon color too, but you can't change your gamma because resolve is actually pulling all the information, um, from the manufacturer itself. So it's, it's all there ready. And in gamma space you can't really change that. Let's jump into our editor.
And so what, what we have now, we're, we're looking at our linear output. We're working in every science with every log. And just to show you that, and I'm going to switch my output real quick just so you can see. So now as I click in here, you can see how it's changed, right? So there's our log. See, that's what we're actually looking at since we're going to via effects, I want to pipe all that out to linear. Don't to EXR it's just a container, right? I'm not changing my footage, I'm not making it, uh, any better, but I'm just giving it a nice fat container so the effects can jump in there and start adding [inaudible] and going crazy with it. What we want to do next is kind of do what they call like a pre grade, a technical grade. And that just kind of basically put our foot in and kind of balance it out.
So in this case, as you can see, our S log here, it's kind of blue. So we want to kind of just give it a quick a balance, which is what I've done already. And I protected some of the highlights. So just kind of give it a quick, a little color balance to make it easier for my VFX artists. I don't really want him trying to have to balance out a shot. I'd rather do it here, control it, you know, so that way all he or she has to worry about is just getting their plates, getting there, the foreground, the background footage, and just start comping, right? Whether it's green screen or if they're doing a motion graphics. So that's what I'm gonna do here. Just kind of go through quickly and, uh, you know, make sure my highlights are protected and just do a quick balance.
And now we're ready to export out to EXR. So you would come to your delivery page and deliver your five shots, you 10 shots, your a hundred shots, whatever it was, you have to deliver it to EXR however you want to do it. I already have the files back. That's the quickest via effects we've ever had. It's already done for us. Let's bring it in real quick and I'm not sure if you guys have used, resolved, are familiar with resolve, but it's got a lot of features that are very similar to final cut 10 with metadata. So you can do a lot of quick metadata searching still if you're familiar with keywording and that type of thing. You can do some of those same things right inside resolve, which is I think pretty cool and pretty handy. So let's look our VFX. So we send it off to VFX. They've got their linear, they worked in and gamma one space. Again, you don't have to go EXR, you can go to progress. So, depending on what type of level of work you're doing, corporate or if you want to do a feature film, you know, make it adaptable to how your workflow is going to best serve you. Um, but since we click bypass on our input color space, I have to tell resolve what this, what these files are.
So we'll select our files and we'll tell resolve. All right, this is since we export it out every color science, this is Arie and their gamma is linear. And I'm going to switch back to every lock C and there you go. So now we've got all of our stuff. In this case, we just added some motion graphics, but it's all a protected and retain all of our [inaudible], all of our highlights. Everything is still there. Um, you know, regarding that, the VFX artists didn't export a clip, anything. Um, but it's all there ready to go for editorial. We can export straight from here as log, see the progress jumping into final cut and throw a lot on there or whatever. The seven Oh nine left from airy, um, or we're ready to color. So I'm just gonna throw this on the timeline real quick so we can see what has changed or hasn't changed.
All right, so here we have on our top, we've got our VFX has given us back to files as EXR files. And um, as you can see here, we've got [inaudible] there's no difference, right? So here's turning into the clips on and off. We're still protected. We have lock C, which for me is what I want. You know, um, again you can jump into Sydney, Sydney log, red lock, then whatever works for you and your environment. But now we're ready to color grade and, um, all of our dynamic range, all of our color information is still there. And something that I've been exploring with and I think is kinda cool. Um, especially for, for like a green screen where you've got a lot of foreground background type of stuff, um, you can actually embed your mat inside of the EXR files, which is pretty cool. So depending on what your workflow is, depending on what you're delivering, you know, you just gotta be careful cause it'll fatten up your files. Um, but it's actually really cool. So I wanna demonstrate that real quick and you don't have to go and resolve and add it as a mat. It's just baked in with the file and it's ready to be accessed at that moment. So in this case, I'm just going to select add mat, right click and go to, I've already rented out the text alpha, so we're gonna really create, crank this up just so you can see the difference.
So if you can see that that text is changing, um, I gave that mat for a text. Let's jump into 2.4 gamma. So you can see now the Texas pink instead of it. Oh, it's, it's original yellow. So not that you would want to do this, but you can kind of see the potential of, of embedding, um, alpha channels inside your EXRs to be able to, you know, tweak that foreground element or tweak that mid ground element and it's all ready to go. Um, so that's pretty much it. Again, you know, using, uh, an ACEs mindset, but using it with resolves RCM, so you're not worrying about input, transforms, output transforms. And, um, it just kind of simplifies things, but delivering unified color space, unified gamma for your VFX and for your color as well. So that's pretty much my presentation.