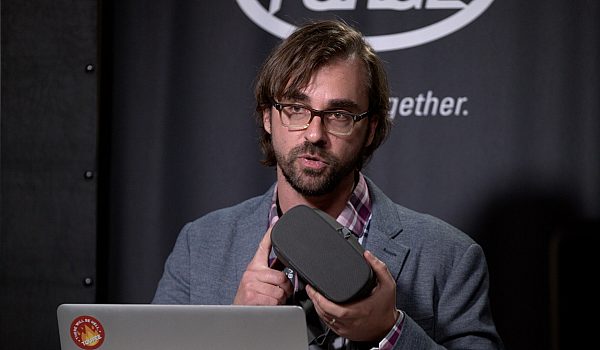
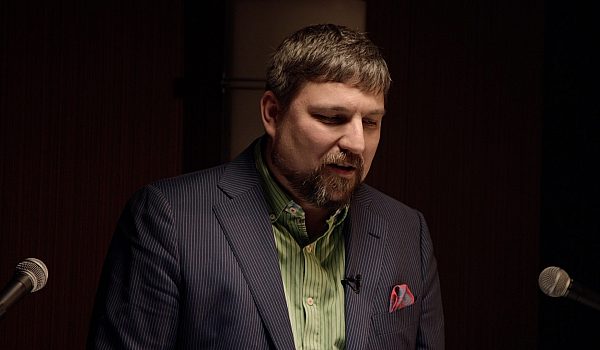
Tony Gallardo shows us how accomplish many of the same motion graphics tasks usually done in After Effects using Blackmagic Design's Fusion 8.
After using After Effects for years, Tony decided to see if he could shed his Creative Cloud subscription and use more affordable tools. Not only did Fusion save him money on After Effects, but he also didn't need the many 3rd party plugins he'd used previously. Much of what required a plugin in After Effects was built directly into Fusion.
In this presentation, Tony talks about 3D graphics, text animations, super fast revisions, and how to replace solids and masks in Fusion. So sit back, relax, grab some popcorn, and learn how to do motion graphics in one of Hollywood's established VFX applications.
Right now we have Tony Gallardo and Tony Gallardo. I got to say, I'm excited to see this. I've heard you talking about fusion and how much you love it. So he's talking about fusion and, uh, let's take, take a look at it.
Thanks Chris. Well, thanks guys for coming out. As you know, I love Fusion. It's been a great, um, program. And so today, just kind of want to introduce you to fusion, if you will, from specifically if you're coming from like after effects and maybe you're curious about what is it, how does it work? Um, it's just, it's pretty awesome. That's all I've got to say and I'm done. Uh, no. Um, there's a couple of things that are great about, you know, um, first of all, it's free. So what's stopping you get out there and download it? Just give it a try. Uh, another thing is that a lot of the, the tools that it has very robust, uh, you know, after effects requires a lot of plugins to really kind of boost it up and, and bring some really cool features to it. It's native infusion, you know, you just got to get in there and start playing with it.
So a lot of the cool elements dial 3d affects, you can do infusion natively, no plugins required. So I just want to show you the interface and maybe we'll kind of walk through like how do we key frame, you know, how do we move something, how do we animate something, how do we make something, uh, halfway decent. So here's the just a couple of quick things that I've just been experimenting with working with 3d and replicated some stuff. Um, 3d text, just kind of seeing what what's possible and what can be done. Particles replicators um, that type of stuff. So you know, a lot of the same things that you like to do an after effects, you can definitely do, um, in a node based system. So there you go. Some fun stuff. Let me just show you that one of the assets that we're gonna bring in, I actually created it in fusion in 3d.
So I just want to show you, you can make it in three. It's just a sphere. And another cool thing about, uh, what black magic has done is they just kind of included in this bin here, uh, a bunch of presets that you can kind of look at and deconstruct. And so they've got some cool little motion graphic elements. Um, some lens flares, some creators. So take a look, explore. All I did was grab this a car, paint shader that they provided, threw it on and gave it a little bit of displacement. So you can see that's pretty much such render that out and we'll go ahead and bring that in. But before we do that, just look at the interface. So there's primarily like three main areas. You got your viewers, much like a comp view and aftereffects up on the top. You can add viewers.
So you can just kinda make a floating viewers and you can have as many viewers as you want. Um, below is the flow. So that's where our nodes are at. And that's where you, you know, you visually see your layers if you will. And then you can also have like a timeline. So there's a timeline exist, just like an after effects, get your spline view as well. Um, if you like working with the curve editor and after effects, you're going to love the spline view. This blind view has so many features you can really manipulate, go crazy, um, on all of your key frames. And I wish I could have a whole episode just talking about the spline view. And then after that to the right is your tool palette. So in after effects, um, or most layer based, um, systems, you have a layer inside of like a container, which is a timeline and you twirl down to get transformed rope, rotational of that type of thing. So it's a little different in infusion and node based. So if you want a feature, you just add it. So if you need it, you add it. So you need some position rotation scale, you add a transform node. So when you select that note or any note for that manner up on this side and the tool palette is where all the parameters are at. They all kind of show up there, right? So let's bring in some assets here. So we got our blog and then we're going to bring in our fire.
All right, so here we go. Again, we've got two elements that we've created. I could talk forever about the difference between nodes and layers, but really in the layer based, you're adding a bunch of layers into a container, like a timeline. And the sum of that is what gets viewed in the comm view. Um, and layer order does matter if sometimes it doesn't matter and infusion in node based, you are building one thing after another, right? So you, you add something and then you add something after that. So whatever you add affects everything before it. So we've got two elements, two layers. We have got a little blob and then we've got the little fire element that goes on top. So we've got to merge them together. So think of it as foreground background. So you've got to put it into a pipeline, right? So you merge two layers together.
Now we can only merge two layers at a time. And that does kind of feel a little limiting at first. But it's really not. And it kinda gives you a, a new way of controlling your layers as well. There's kind of like, um, a global parenting. So in after effects you want to activate parenting, you know, between two layers you have a turn to get to tell it dude that you're going to be a child of this layer. And in node based it's kind of inherent mostly. So I'm gonna add a transform node, right? Let's view that. So now as I moved this one transform node, it's moving everything. So the blob and the fire that we, we brought in. So it's kind of acting as a parent if you will, of everything before it. And same thing for, for like bad at a blur.
This blur is pretty much acting like an adjustment layer. So a blurs everything that's coming before. All right, so let's animate this real quick so we can go to the timeline just so you can see. Here's our transform. We're going to go to around 10 and how do we animate, how do we set key frames? Well, you can come up here to your tool palette. Double click on the center. Now I've made a key frame at frame 10 and it visually shows me now that it's green. So I know this key for them. So if I step off that frame and it goes to blue. So I still know there's key frame, but I'm not parked on the key frame. So I moved back to one frame. There we go. I'm also going to animate the size. Go back to the beginning. So here's my two key frames. Let me make this one view. I'm gonna move this back. I'm going to scale it and be prepared to be rebutted with amazing animation.
Yeah, so we've moved on the X axis, but you know, just didn't get the idea. There is a timeline, there is layers. It's there. And let's step into the spine. Do you real quick, cause we don't want to have a linear movement. One of the cool things that I, I figured out a couple of weeks ago was an after effects. I love the TLD key. Hit the tilty key. Go full screen. Did not know it existed in fusion, but it does F four. So F for full screen, you can really get inside and go crazy with all your pixels. Um, so we're just going to go ahead and hit shift as kinda smooth these out. Just a real quick good or size. Do the same thing.
Smooth is over a little bit. So just real simple, simple animation. Nothing crazy. All right, so I wanted to show you guys something else real quick. What are the foundational things in, in an after effects that you use? It's a solid to mask, right? You use the solid for everything. You want to edit a vignette at a solid, you want to maybe add some color to something or shape. It's a solid, right? You want to add a filter to solid. So what's the equivalent in fusion? Well, it's the background tool. The background node makes a solid yay. Um, but it can also do a lot of other things as well. So it's not just a solid crater. You can, you can make gradients for color gradients. Um, but one of the cool things I really like about it is that you have the custom ingredients.
So you can really come in here and make any type of custom grading that you want in one node. And if you start to mess around and play around with it, you can start to do cool things, um, by animating the offset, putting things like on a, let me select the snowed like on ping pong here. So now you kind of creating these cool little waves based on a gradient map and you know, you can adjust this and if you want to change, if, so whatever you really need, you can kind of adjust this and make cool little like displacement maps as well. So based on how you adjust your, um, your gradient map, you can get different results. So that's how you would create a solid infusion. The next thing is, is masks. So they're very similar as the art after effects. So I'm going to create a, a mask real quick.
Took me forever to design that mask, by the way. Um, so how do we move mask around is just some things that I like real quick, but you can hold the alt key down and click anywhere in your viewer and the mask will move, right? So if you want to rotate the mass hit the Tiki for twist and the mass rotate. Now wherever you click, that's where the anchor point for that rotation is. And the same thing for scale. I can hit S scale the mask if I want to scale from the top right, I can scale it this way. I can select just certain parts of the mass. So if I'm rotoscoping and Amanda mating and I only have a couple little features that I want to move, but I don't want to put my mouse right over the mask. Um, you know, you can move it again, holding the LTE down or scale it and rotate.
So just some cool things that you can do. You can also feather base on each point, each Vertesi. So I think that comes in handy. Fusion has a lot of what they call modifiers, but it's really just a way of adding more power, more features to certain parameters. So in this case, I've got a text, I've typed it in here, I right clicked in the style text and you can see right there it says follower. I've already created a follower. So let's step into the modifier. And all it is really is just a sequential text centimeter, right? No biggie. But what's really cool is say you're designing something, you're, you're creating this tech for somebody and you want to try something different. Well, instead of duplicating that layer or duplicating that node up here, they've got these things, what they call settings, but they're really just like a storage bank or a versioning system. So you come over here and go to [inaudible] and I've already animated something in there. Let me scale this up.
And then an S two I met in may something different, S three, and let's say that I'm working in a team environment, right? I got somebody working um, across the country and I would like to share this with them so I can copy that, that node. So select the node and copy it, go to a text, edit and paste it right then and there. You can paste it, email that to anybody. They can grab it, copy and paste it in their flow and aware that going all the animation is all there. Everything is just like the end. You can do multiple nodes, it doesn't have to be just one note. So that's something that's kinda cool to be able to share it to debug. If you want to do bug or just want to share this with a producer, pick one and the way they go. So I created a background and it's in the settings.
Let's drop it in. Uh, this is the Ben, I know I showed you guys earlier, but it's a great way of, you can build little modules, little filters, and just save it here and it's available to you anytime you use it in any project you want to. So here, let's do another merge. Do we have this as our, the final of our pipeline, we're gonna add a background to it. So take the output of the transform, put it over, over the gradient. We can view that. Now we've got our little fireball over a background and I'm going to end CC kind of just give it a little bit of pop cause I don't like it. So flat. Okay, so now let's, uh, let's just pretend that, um, I have somebody else working in fusion. They made some texts, animation, and they sent this to me and then a text file. So I'm going to copy this. Go back to fusion, pasted in there. It is an emerging over view that merge. Now I want to go to my modifiers and a look and see which one, which animation I like. Hmm, I like that one. Let's change this text faster together.
All right, so that's great. But what if I wanted to have this text match the movement of my fireball, right? I just don't want it to sit over my farm, but I want it to match. So how do we connect that? How do we bring those two together? Well, let's add a transform node and I can right click on the center here and it comes up with all these different features. So I can modify it with an expression. I could use shake or perturb, which is very similar to like a wiggle. Um, but I want to connect it to one connected to path, one position. So now my text is connected and following exactly the same, uh, animation curve that my fireball is. And I wanna do the same thing for my size. So I'm going to say connect to transform size. So now the size matches, that's great. So I want to move it, I don't like, I don't want it to be there, so I'm going to add another transform right after the text and I can just move it wherever I want to. And it's still obeying the connected basically like an expression, like you've connected the two points together. There's still a Bay, but now it's in the position where I want it to be. And for some reason, if the client sees us and says we love it, but, uh, we want to change the position of the texts, we don't like it there. We want to move it to the front of the fireball. Well just come over here to S to move it over and then three days later they say, no, put it back. We want to go back to the other way. It's right there. So that way you kind of hedging and building some ways of going back, I think to some breadcrumbs. Um, or maybe you want to give us this option. So look at this way.
Look at version one, look at version two. So that's something that thing, it's kind of cool, a little time saver. I would like to put a little heat intensity at the back of that firewall. So I built a little heat intensity package, if you will. I took a color correction note and obviously as you can see, it's just blown out the whole fireball, right? So I want, I want to be isolated to a certain part of that firewall. So how would you do that in fusion? Well. Um, you can essentially just output this, this fireball pumping in a couple of bitmaps and all I'm really doing is giving it a light wrap effect. So if you guys familiar with ad using light rep and a modifying it with some fast noise, controlling it with a rectangle and then uh, controlling it with the alpha from the fireball and with another bitmap. So now I've isolated exactly where I want that color correction to happen. And let me plug this in.
Let's get, so there's the overblown fireball and now let's control it with our bitmap. There we go. So now we've just isolated to just that part of the fireball. Let's add some glow. All right, here's some glow and pumped the intensity up just a little bit. There we go. So great. So now we've got some cool looking intensity at the end and of course I don't want to stop there. I want to keep going and add more. Somebody out there on the interwebs made this really cool heatwave plugin. So I wanted to see can that be done? Can that be mimicked in sign of fusion? And it can.
So here we go. This has got this big spider web of mess right here. What have we done? Let me pipe this in so we can see what we've done. All right, so now we've got this cool looking heat wave with some wisps in the background. So what have I done? Well I basically just made a fractal noise. It's called fast noise and fusion. Put a mask on it and just repurposed and reused this one fractal maps. So if I want to change like the heat signature if you will, all I have to do is just one fractal map but just distorting it different ways, re distorting it, adding blur, um, and does adding multiple uh, distortions. You can come up with some pretty interesting effects. All right, so let's just quickly Ram preview that. You can see that it looks like my heat distortion is kind of just being static. So we can do the same thing. We can connect this mask to our animation path. Real easy, connect to path one position and the same thing for the science connect to transform science.
And that's it. Now it's following exactly along with our firewall. We've got our text position right where we wanted, and if the client comes back and says, no, go back to position two. Well we just go to S two and there it is. So that is just a real quick way of looking at starting, bringing some assets and to bring in some layers in. Um, and uh, doing some simple animation. Obviously, you know, jump in there, explore the spline editor is just insane. There's a lot of cool things that you can do with the spline editor. Duplicating your key frames, putting a bounding box around them, really warping and transforming your key frames so you have ultimate control of how you want your animation to come out. So hopefully you guys can see a little quick overview of how fusion works. How do you animate, how do you add key frames? How do you connect things together? Um, and just go out there and explore. Try it!


 Mobile
 Tower
Tower
 R24
R24
 Builder
 Manager
 Connect
 Kyno
Kyno
 Media Engine
 Remote Access
 Support
