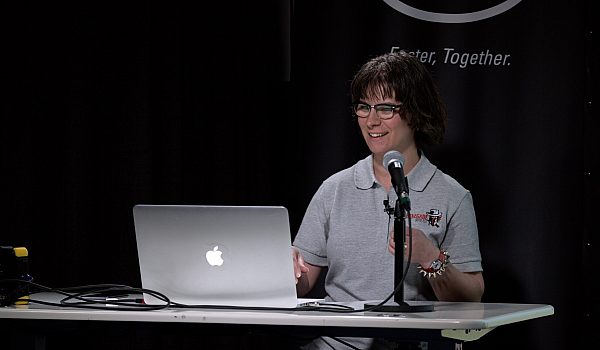
Steve Martin from Ripple Training teaches how to work smarter and faster inside FCPX 10.4.1 using some of his favorite tips. Learn how to use Secondary Storylines, Gap Clips, Audio Roles and much more to your advantage.
- Apple just released 10.4.1 this morning on closed captioning and if you go over to our YouTube channel there's a movie up there that explains all the features right now. I was gonna show it to you but, well you can just get it all from the movie. Anyway thanks for coming, thanks for being here and listening to me in the next 14, 13, there's a clock right there that's running me. I know what's going on. So I thought I'd do a presentation called Working Smarter and Faster and these are basically a compendium of my favorite shortcuts, tips, tricks that allow me to work faster. Final Cut in itself is a very fast application that's why so many of the LumaForge folks like it in their own editing environment. You're just gonna see some of again my best tips. I'm gonna go through them as break neck as I can and we'll see how many I can get through maybe I can do one a minute, we'll see. OK so without further ado we're gonna start with just something that a lot of people tend to be confused about and that's Secondary Storylines. OK so as you know you have the Primary Storyline here and this is where your story is told and then you connect B Roll on top using what's known as a connect edit. But one of the things about connecting clips is that if you wanna do a ripple trim on something they behave a little bit different than clips that are in the a storyline and the magnetic timeline seems to be in play there but not so much when you do things like move clips around because everything's connected. This is where connected storylines or Secondary Storylines come in.
I find them a big boon to my productivity so I'm gonna go ahead and select that. An easy shortcut to remember this is Command G. I think G for group. I'm gonna group the clips. Command G will group them and immediately you'll see that the clips have this gray area at the top called the shelf. In that shelf now you have one connection point and I can move this wherever and I can copy, and paste it, move it. So I've related B-Roll I never have to worry about well am I gonna get everything I just copy paste drag it and it's really helpful keeping related content together as a connected unit. Here's another example where I have four clips in the primary storyline and I want to immediately turn them into a connected clip so one of my favorite commands is to select the clips I want to turn into a Secondary Storyline and then Command, Option, Up Arrow. That'll immediately create a gap clip and connect it to it and now I have a connected storyline. The nice thing about connected storylines is you can now you can do everything in a connected storyline that you could in a primary storyline which means you could ripple, you can roll, you can swap clips which you couldn't do before and I think that's again a big reason why I like using these. The other thing I like about these is that these gap clips behave as timing clips. So Charles is coming in, he's gonna say something. Well because it's connected to a gap clip I can just select the gap clip and I can trim the gap clip back as if it were a clip and now notice his audio is starting below the secondary storyline.
- The key decisions along the why I make--
- So you can use the gap clip in a combination with the connected storylines to do some pretty interesting things OK. So that's my first little tip for working smarter and faster. The other thing I want to move into talk about some audio stuff. I'm gonna open up this timeline. Of course in 10.3, Apple introduced the roles and before 10.3 roles were a mess. You had dialogue music and effects everywhere and the correct way to clean them up is to open up the timeline index and hit the Show Audio Lanes button and you've got instant organization. Order out of chaos. It's just fantastic. But what I like even further about this is that, and this is certainly one of Sam Messman's favorite things he likes to talk about is let's say I wanna put an effect, a limiter on just the dialogue or maybe I want to add a compressor just to the music. Well it's kinda challenging that all of these are individual clips to drop a particular effect on. So what I find is to create a mix down and to do that you just click inside the timeline. Press Command A and this time I'm gonna press Option G. Last time was Command G. This one's Option G because I'm actually making what's called a compound clip.
As soon as I do that it takes all that content and brings it down to three what are called Role Components. Oh it zooms, that's great. So you'll notice I get a little mixdown badge here. So all that dialogue that you saw has now been consolidated into a single role group called Dialogue and same with Effects and same with Music. What's again fantastic about that is that you can change the volume for everything in that Dialogue Role container. You can key frame it and you can also add Effects. So if I go down here to the audio section. Maybe levels. I typically apply a limiter at the end of the effects chain that's to make sure all my broadcast levels aren't peaking or distorting. So notice here I can throw that limiter right on that entire Dialogue sub-role and it's applied to everything inside it and by the way you still have access to everything inside the compound clips. You just open it up and you can go ahead and make tweaks and even put effects individually on these clips but I'm showing you, it's like you've just turned your entire timeline into this little mixing unit now. So these in effect become sub-role. They become sub-mixes essentially for on the way out of Final Cut Pro X. So that's something that you'll find really really useful when you're ready to deliver your final product. Let's look at something that I like a lot which is working with audio. Audio is a big thing because everybody well at least most video editors I talk to, audio is always the red headed step child of video and there are some great little tools in Final Cut Pro that a lot of people don't know about. I'm gonna zoom in on this clip and I'm gonna play it back and see if you can hear a issue with this.
- Hmm.
- [Steve] So you hear this like there's some weird gulp sound and I still don't know what that is but it's gotta go, OK. So my player is parked over the clip and I what I wanna do is expand the components Control, Option S. You gotta work in component mode to do this but what I wanna do is isolate that noise. I'm gonna press R to bring up the range selection tool. Select this and then make sure I have it selected by pressing the forward slash key. Alright we could do that all day if we want. Alright now I wanna , I wanna knock it out by pressing V and what V does of course is it disables that section. OK we have another problem now it just drops out and we need to have the audio consistent. We need some ambience there to fill in that spot. So what I'm gonna do is again use my range tool. This area right here is clean there's no noise. I'm gonna use a piece of that right there. I'm gonna press Command C to copy that section. Move my player just a little bit before the knocked out audio and I'm gonna use a command called Paste as Connected Clip or Option V. What that does is it takes that section I just copied and it pastes it right below the section here. I'm gonna go ahead and move this here and adjust a little bit. This is fantastic because now I've got this ambience but check it out. You can also smooth the in and out. Right here on this silent section there are fade handles. Which means you can grab these and you can feather in the amounts coming in and out of that silence so it's not so abrupt and you might not get a click or a pop. So I'm feathering it in and out and now when I play this it should sound pretty good. There you go, I call that surgical sound removal. So that's something you want to keep in your back pocket.
OK let's move on to some other stuff. Six 46 . Alright so now we're gonna look at some gap stuff. Timing with gaps. I'm a big fan of gap clips and people coming from non-linear editing systems like Final Cut 7, Premiere and Resolve. Their big thing is I don't really understand gap clips. I don't understand isn't there a track select forward tool. I wanna be able to, well gap clips are your friend in Final Cut Pro 'cause they do so much timing work for you. So let's look at the first way I might use it. Let's say I have a bunch of content stacked in the timeline. I'm just gonna quickly put some stuff here. I got all this stuff here and I might be zoomed in here and I wanna be able to open up a space here. I want everything in another editing I would use tracks forward and select everything and move it down but in Final Cut because of the magnetic timeline all I need to do is park the player on an edit point. Press Option W to create a gap clip and then just drag out the gap clip. So you'll see as I'm moving the gap clip everything downstream will move with it. So gap clips become a really useful tool for changing timing in Final Cut Pro X. So I use them all the time to create spaces for my edits. So big big thing there. The other thing is you wanna use gap clips for other timing purposes like for example. Let's say a client comes in and says I wanna use another shot there. This helicopter but we haven't shot it yet. I like the timing so you can select the clip and hit Shift Delete and that will create a gap clip and keep the timing in tact which is really handy. Here's another scenario over here where I've used a gap clip to open, I'm gonna just delete that for a second to open up some space. I'll play this.
- Crept up there and thought wow that must be incredible to be able to see what they're seeing from the air. One thing that's unique.
- So again to open up I gave him a little more breathing room there I'll just press Option W to create that gap clip. So what's really nice then is I can then use that gap clip as a timing to match. In fact let me just go down arrow. I'm parked at the gap clip. I'm hitting the left bracket key to select the edit point and I'm gonna down arrow it again and in Final Cut 7 we had a thing called an extended and in Final Cut X it's Shift, X and that will then extend whatever clip you have selected to the play head. So that's a really good shortcut to Shift, X as an extend edit to move clips to wherever the play head is parked. Alright so let's look at some other stuff. This is probably one of my favorite, favorite, favorite tips. It's called the one frame gap trick. So I'm gonna select this music clip and I'm gonna press Q to edit into the timeline. The way connections work in this case a connection line is right at the very first clip. So a lot of people are like alright I'm gonna move this clip or I'm gonna delete it. Well the audio of course is gonna go with it. So here's my little one frame gap trick. I'm gonna go to the beginning of the timeline. Press Option W to create a timing gap. Select the gap. Hit Control D for duration and then type one for one frame.
Now I have a one frame gap at the very head of the timeline so when I connect music, Q. Guess what it's connected to? It's connected to that one frame gap clip at the very beginning. So you just never see it. It's just there it is connected and what's nice for me is I never have to worry about any clips at the beginning. I can delete them. I can move them and it's always connected to that one frame gap clip at the very beginning. So a little trick that you can use for mastering and wrangling that magnetic timeline. A little thing you can put to use. Alright so lets go into the connected storylines. I'm gonna show you a couple of things with connected clips. OK I'm a big fan of connected clips. Like I said you have a bunch of connected B-Roll here connected B-Roll here but there are some cases where you're gonna wanna override the clip connections. Here's a perfect example. I have a title here and let's say I wanna slip this edit. So I'm gonna press the T key and notice as I'm using the slip tool what's happening with the connections is they're all moving and I don't wanna do that. So really useful shortcut or modifier key to deal with this so that the connection point stay where they need to stay is to hold down the Tilde Key or the Grav Key whatever you prefer to call it Tilde, Grav and notice you'll get basically what amounts to a link override option there and what's nice is now when I slip the clip all of the connections stay exactly where they're supposed to stay. I have to show this to people especially the people coming from Track Based editors they just get frustrated. Why can't my connected clips stay there. They're always moving.
That's probably one of the first things that I show people they need to do is how to temporarily override the clip connection. Another option would be notice of all these clips connected to this clip. Notice that when I move this everything moves together. If you've ever watched any of Thomas Grove Carter's demos on his commercials. He just moves just whole chunks of his story from one place to the other. I mean hundreds of effects. Hundreds of music cues and just moves them and swaps them. I mean it's truly magical to behold and that's what's the beauty of the magnetic timeline but sometimes like in this case I'm moving this but maybe I don't want that last clip to move. The reason is that connection point is on this clip. Again something all new Final Cut Pro editors should know about is the Command Option click. So that connection point for this 081 clip is here but I want it here so I'm gonna Command Option click. Notice now that connection point has been moved to this other clip. So now when I'm moving this clip all of just those three as the other ones stay put.
So in terms of working smarter and faster just being able to override those clip connections and also being able to reassign where the clip connection occurs is also a big deal. So I'm down to exactly four seconds so , I wanted to thank you guys for coming to my little quick tip the smarter session. Hope you enjoy the rest of the show. Thank you.


 Mobile
 Tower
Tower
 R24
R24
 Builder
 Manager
 Connect
 Kyno
Kyno
 Media Engine
 Remote Access
 Support
