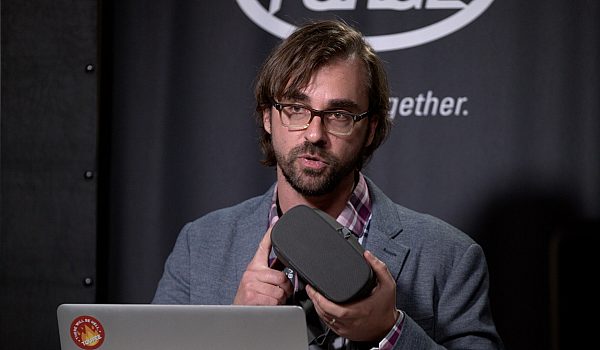
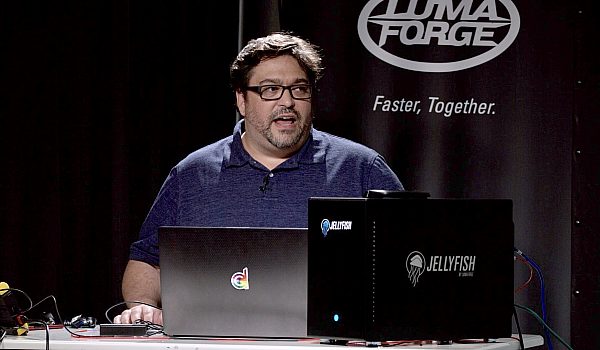
Steve Martin from Ripple Training walks us through production & post production process for MacBreak Studio, a weekly web series on video post production on the Mac.
Steve talks about working with Multicam Clips, iXML, Roles & Subroles, as well as basic audio editing in FCPX 10.3 and later.
I mean, you've seen Mac break studio on or YouTube. Okay, good. You're already familiar with it. So I just want to quickly walk through some of our gear and what we do. I'm going to spend it like five, six minutes on that before we jump into final cut pro 10. That's me. That was my first training video. Has he used VHS series back in 1999? Totting IMAX final cut pro a to Z. um, we're a production company. There's my partner Mark. I like to shoot a lot of stuff underwater and that's kind of what my hobby is. And, uh, and a little bit about production gear. We like to see one hundreds, uh, Mark twos for a shooting. We don't care about four K because everything we deliver is a 10 80. And you know what, almost 80% of our people aren't gonna watch it on this. So that's one of the reasons. And also we like the fact we can go into Walmart or Walgreens and buy media cards for the camera. Right? We like it. It's our studio camera. Um, we have a little, I literally bought a barn and I live in Prescott, Arizona and we leave the digital barn and we set it up for a little, a little mini television studio. There's actually chickens outside there and horse that you can actually hear the chicken chickens and you listen carefully.
We also shoot at pixel corps in San Rafael, Carole California. I traveled back and forth to, cause Mark actually lives in the Bay area and so it's up there. And my good buddy ABA Shapiro and we have guests at the digital barn and uh, they come and present, um, a little bit about how we set up our, our shoot is, I'm uh, I'm kind of paranoid about no dropouts and things going wrong during the shoot. And so, um, you know, I have a saying about data. You never have data unless you have it twice. And I would feel that about audio, you know, audio only should have it twice. So in this case, what we do is you can see here that the C 100 has a handle that has XLRs. It's feeds the camera, but we also have a H four N on a separate, uh, a separate stand that we're feeding also our audio.
So we have audio in two separate places and we use this little, see that little splitter down there. I think that we got that at BNH or something and it would basically taking two feeds. We use two Sony ECM, 77 B lab earlier microphones. Very good quality interview Mike. So I where Mike Mark, where's the Mike? And they're both fed into the splitter and then the splitter sends that signal to the H four end as you see there. And the C 100. So we uh, we actually have two, two Mike feeds, uh, post-production really quick here. That's our edit Bay and we run everything off of IMAX. Oh one other thing about the sea 100, I like shooting 10 at 10 80 rather than for K of the C 100 is also, the compression is very good and you get really small files. I don't like store having to store huge files.
I don't want big 4K files on my iPhone. What am I going to do with this? I mean I shows done, I want it be fourth year. So that's another reason why I wouldn't see 100 really small footprint files. I can have, you know, right now I have over a hundred shows comparatively speaking. It's actually a very small footprint to let's say a fourK footprint. So, and of course we met Rick, we're actually pushing our 400th episode. We've been doing this. We did to start with a final cut seven and we've been doing this a long time. We were, Mark and I were talking, we were going to do for 400 I know I want to jump out of an airplane and do it from the sky as we're coming down. Click on the file menu and then then cut to the interface. I just think that would be really fun.
So, and then of course we produce these uh, under five minutes. So when you're on a subway or bus or train, you're like, okay, I know what I'm getting myself into. It's like I have five minutes. It's very clear in the title under five minutes. I can do that. So the idea is we created these and we have quite a few of them now. They're very, very popular. I wish I had time to give you my whole business philosophy of why we do this. Cause that's a big part of, you know, well why do you give all this free content away? And it really has to do with my own, under our philosophy on, on business, there's three essential components. While this free component in the past, the way you'd advertise to people as you do that top of mind, you'd spend millions of dollars in advertising, billboards, radio, and, and you're just spending all this money just trying to get as many eyeballs so that when you're ready to buy that Lexus or the Starbucks cup of coffee than, or whatever, uh, it's already you've just been assaulted.
Um, by messaging. Okay. The other type of marketing I call frame of mind awareness or frame of mind awareness is the idea that we're not necessarily ready to purchase. You're, you're online, you're, you're doing your thing, you're searching. And, and a frame of mind is people that are working for companies interacting with you socially through social media and they've been doing things to kind of put you in a frame of mind so that when you are ready to purchase, you're like, Oh yeah, those guys that, you know, I've seen the banner when they tweet, I'm going to order, there's a third method of marketing that this is what I subscribed to. I call it friend of mine awareness. This is where you're being extremely helpful to people. You answer their questions, you give them free content, you do all this stuff so that when they are ready to buy, so those guys were helpful and then they end up coming to you and purchase from you.
It's the way the universe works. Give and it shall be given. And it seems counterintuitive, but that's the way it works. And um, the, the, the founder of geek squad, they use sass. The same thing. He put a hundreds of videos online. W why are you putting on these videos? How to fix computers? That's what you do. He goes, yeah, I do. They people think they can fix their computers and they get stuck and then they come to me and then I've helped them fix it. So the idea is be supremely helpful. That's my modality. That's my thought. That's, that's my mindset in that it's just, I want to be extremely helpful and hopefully when you're watching your videos, you're like, yeah, those guys are really helpful. And that's if you're picking up on that, that's exactly my philosophy behind the show. All right. And then, uh, the book that I recommend that really was transformational for me was a book called utility.
Jay bear is a author, check it out and uh, it's a short read, but there's a little bit of, um, my thinking into why are we even doing this? Okay. All right. So that now I want to jump into final cut. The first thing is, um, I want to kind of walk you through the elements. So here is Mark and I, we're in the digital barn and this was shot with a C 100. Okay. So we have that and that we have the audio feed from the camera, upper left panel and man it's really great. We then also record the Mac book screen. So obviously I'm looking at a Mac book pro and I have my macro up here. So there's my MacBook pro and we record that screen with the audio on a ride direction in a depart direction. So right now, okay, the last thing, remember I told you I was a paranoid freak is that I have the audio from that age four end.
Remember I split the audio right? This, this 81 split, I'm going to just drop. Okay. So very important to understand that this is, these are the three components that we end up with for our, any one of our Mac break episodes. Okay. So where do roles come in? Well what I'm going to do is just like this, I'm going to bring up the roles inspector and if you can hear this, that's the microphone. My eight ECM 77 and then this is a little while cause you got a cart Mike. But these are the system assigned sub rolls. And I don't like system assigned sub roles. I'll email. There's two channels that, Oh, it's a high like one mind or mind you, I can't remember. Um, but I'm just going to walk you through the process anyway. Uh, cause a lot of times we have trained editors that work for us.
So let me go to edit roles and what I'm going to do is add some sub roles. I'm going to call one Steve turn at another sub role Mark return and I'm going to add another audio roll and I'm going to call this, um, H four N and because I love colors and I get more of them now at 10, three, three woo. But they all looked the same to me and I just die. Wow. One's teal and one slight teal. I okay. All right. So, so I'm gonna add a couple more roles. I'm going to call this Steve and I'm going to add another sub role. I'm going to call this Mark. Okay. I'm gonna add another parent role for the Mac book, Mac book, uh, the audio. Okay. I'm so, I'm setting up all of my audio before I actually create my multicam clip.
And I make a big deal about this. If you're going to be making a multicam clip or a synchronized clip, it is essential that you do this before you make the multicam clip. So you want to tag it. So when it makes it, everything's all kind of pre tagged. If don't, then you gotta go into the clip and then rename it. It's kind of a, an annoyance. Okay. I learned this from my good friend Michael Garber. Okay. Yeah, it Apple. So yeah, he showed me. So I don't like this orange color, so I'm gonna make it this, you know, Mav color. [inaudible] I don't know that we're getting into Google territory now. Okay. Um, so there we go. Now I want to do is I'm gonna go over here and uh, I want to assign the sub roles. So for me, we go down there, Steve, and then I'm going to go down here and, and find there's Mark.
Perfect. Now I want to go to the H four N audio and I want to break this out into dual mano tracks because they were dual monitors just for some reason they came into stereo. Okay. Do you get, that's the first thing I needed to make sure that their dual motto instead of stereo there's me, but I'm going to, I'm going to sign that each for in audio and there's Mark. Okay. And then the last thing I'll do is I'll select the ScreenFlow, which has its own several identifier and there's my MacBook audio. So it's really nice. And by the way, I'm not seeing all the not seeing. I need to sheet see the wave forms. What's nice about this is that I can now clearly see, I've got color coding from their main camera. They got color coding for my Mac book and I have color coding for my uh, H foreign backup audio.
Okay. Now one other thing I recommend when you're doing multicam clips is you should get in the habit of assigning metadata to your clips. So I'm going to select this clip, this main clip, go on the info inspector. And let's see, I like to switch to extended view because you get more options in the metadata and whenever you create a multicam, I highly recommend you assign angle names because funnel cut's going to assemble them correctly. People don't realize if you don't do this, then you get a mess and you get to like, why did it put that angle here and the single over there? And uh, you really need to do this. So what I'll do is I'll select the main camera. Let's like a, I'll select my, my ScreenFlow is actually angle B, so I'll select that B, and then my H four N is angle C.
okay, so that's it. So now what I'll do is make the multicam clip. I'll select that one. It's like that one's like that one control click new multicam clip. And I'll call this M B S and I think this is Mac studio three, seven three and I'll use audio for synchronization. I generally leave everything automatic. Remember I took the time to tag it just now. Final cut of smart enough to know how to assemble this based on my camera angle names. By the way, the way it works here, automatic goes. Okay. I'm looking for camera angle first. If I don't see it, I go when I'm looking for camera name, if I don't see that, I'm looking for the clip name. So it just kind of a pecking order. That final cut pro goes by and I'll just choose, I'm gonna just leave automatic, which is a pretty safe setting and you got to make sure that you have back checked of course.
And then we'll go ahead and click okay and so final cut and we'll now dutifully go through my audio away forms and synchronize everything. And what I want to do is select the component and let's go ahead and create, already have a project created. It's all open up Mac break three 73 select the multicam clip precede, add it to the timeline. Okay. There I have it right now. One of the things that I like to do when I'm working with like clips cause these are the actual kind of clipped names a is go over to the clip and appearance button and I like to show clip rolls. Why do I like to do that? Because when I do that I'll get the actual clip, the role names on the clip itself, which is pretty handy right now. Uh, I'm going to bring up the angle editor by pressing shift command shift seven.
And you can see because I took the time to do everything, I got angle a and B angle C do that. It's really nice. Um, now I want to set it up. So I'm gonna just go ahead and I'm going to cut a to B. I'm going to set this up. So when I cut, and by the way, when the clip is in the timeline and you click, you'll notice that I have the razorblade going to make a cut. I don't want it to cut. So this is for those you don't know if you want to just switch the angles without making a cut, you actually hold the option key down. So option clicking, we'll swap the angles. So now I just clicked and look what I'm looking at, the knack book audio and when I option click that look when I'm looking at, I'm looking at the H four N audio.
So click, click, click. And I can really do that. Now. Um, thing is I want to be able to switch the video independently. The audio, I want to use this audio. So I'm going to do, I'm going to set this for video only switching. So now when I click, it's only switching the picture, not the sound. All that's using the sound from camera a Hey. So I'll go in here and I'll figure out, okay, where do I want to cut to? Okay, so I obviously cut that out and we'll come back to Mac breaks. Okay, so a bit back this up. So right there I'm going to press option left bracket. Going back to Mac break studio on Mark. And here with Steve, we're in the studio in beautiful Prescott, Arizona and the digital barn. Steve talking about final cut pro and a plug in the spinoff for a little while that you just let it play and I'm going to just do a live cut.
Okay. So just discovered it and when you're really on it. Yeah, it's a plugin that uh, create split split screens like you know the opening 24 even going back to the 60s, early seventies, the Brady bunch and all the little corners. Yeah. And the Hollywood squares. Exactly. And sometimes you need to create that. And our good friend Simon [inaudible] who has a YouTube channel, he does a lot of motion tutorials, banner Tokyo effects Tokyo effects. I'm sure deliberate them. So to get to the good part, new video, there's all the intro of a couple of examples here. Click just to go ahead and play here. So there's three train on, she's flying in and I just watch anything I look up in final cut pro but it would take till I looked. Oh I looked up. So I'm cutting back on us cause Mark's talking. Here's another example, click back on the interface.
Vaping. So like kids, kids want to vape and I created an anti-vaping PSA. They put it in their face. All right, this is why vaping is bad. These three clips here, notice I have them pre. Okay. So basically, um, I just cut back and forth between these things here and you can see here and play here. So there's our three ripple train I was flying in. Okay. Think about it. So it's great and you can see from the timeline itself, it's so easy in final cut pro to set up this kind of a thing. So we go from the green screen, we go to, you know, the cut to the interface cut back to Mark and I kept the interface goes, it's pretty straight forward stuff right now what's really interesting is if I open the inspector, cause I'm parked on the clip and looked at the audio, check it out.
A what? Right now, the camera, right now I'm S you could see that I'm using the, see the camera audio, Steven Mark from the C 100 but the other ones are disabled. So, but let's just say for whatever reason, whatever reason, let's say on this clip, the audio dropped out or what have you. And it's like, Oh, um, I could disable, let's say D disabled Mark and I can show, you'd be, see, this would be my age for in audio. And I'd say, look, you know, I know Mark's audio is right there. So I go ahead and select it and instantly I get Mark's audio that can just like that and everything's perfectly in sync. I can then I can use this particular clip. And in fact looking at it in the index, let's see here. Okay. Like that. Let me go to the roles. You can see, um, there's marks each forN and then for that, for that little piece here.
Okay. And it's, and it's completely disabled in the, in the main audio. In fact, I tend to rearrange these. So like, you know, let's see here. Um, you want to rearrange it. There we go. There we go. Put that, I like to have that on top. And then I close it. And by the way, what's really nice is when I close everything down, uh, the clip becomes gray, which tells me whenever you see a gray clip, that means that the clip is working with a mixed rogroup. So mixed roles, me and I have my H four N and my, uh, mic 100 audio being used. So I can quickly see, Oh, the editor to look at that and go, yeah, that great clip has got some mixed roll audio in it, right? So that's essentially our workflow. And also in terms of green screen, just real quickly this, the last thing I'll say is when I do the, um, the key, I actually go into the angle editor and I select the angle and I add the effect to the angle. And then I actually connect the background. I'm trying to connect the background here, the keys applied inside the multicam clips, so that way I don't have to apply the key to every little piece and I just open it up and then it, the key just, just works. It just works. Fantastic. So there's my presentation.


 Mobile
 Tower
Tower
 R24
R24
 Builder
 Manager
 Connect
 Kyno
Kyno
 Media Engine
 Remote Access
 Support
