 Mobile
 Tower
Tower
 R24
R24
 Builder
 Manager
 Connect
 Kyno
Kyno
 Media Engine
 Remote Access
 Support
Adobe has made major changes to Premiere Pro CC in the last two years. Post-production consultant Jeff Greenberg gives a list of his Top 5 new features in Adobe Premiere Pro CC. Find out the coolest new tools in Adobe Premiere from an editing veteran.
Learn about new tools for color grading, shot matching, Shared Projects, audio ducking, and 360 video editing.
- Like you, I found about the Adobe announcement. I took a quick look through their feature set and said to myself what are the things that I think are most important with this given release, and that's what we're gonna look at today. And the first one I wanna start off with is the shot matching. This has finally come to Premiere. I wanted you to see exactly how it works, so I'm just switch over to Premiere. Here I am in Premiere Pro. I wanna teach a Premiere Pro tip before I go any further. It is not documented. Control slash on the PC, command slash on the Macintosh is gonna get rid of all this dead weight up here, boom. And you'll now see, I can't move it off screen. I now have it taking up all the real estate. And I'm going to go to their color workspace. I'm gonna have two shots on this timeline, or two women here, and I kind of would like them to have a little bit better feel of a match. And I really like this outdoor shot. It's nice and moody. I want her to match that. I'd like you to see, we've got here on the Lumetri color panel, a choice called color wheels & match. I'm gonna go ahead and click what's called here the comparative panel. I'm gonna bring that up. Let's make this a big wider, so we can see it. And I'm able to pick anywhere on my timeline.
Now, I just have two shots here, and I can go prior shot, next shot quickly and easily. And it's just going to match the reference shot. You can see reference over here on the left, current on the right. I'm gonna press apply match, and it's done its work. It's made it much more contrasty. I feel like this has still got a little bit more warmth to it, maybe, but you can see what Premiere has done. Is it's said hey, I'm going to adjust the mid-tones a little bit brighter, pull down your shadows, pull up your highlights to get them to have a nice feel. And I'm gonna go to curves and I might say, you know, I feel like I'd like just maybe a little bit more warmth, so I'm just gonna go to the blue curve and just pull that down just a little bit extra. There we go, maybe pull back a little the saturation. But it's this idea of a shot match.
Now it doesn't just do a shot match. There's a button right over here. In fact, before we do that, let's click this button, vertical split, and we can really get a feel for how that match is working for us. If we have our Lumetri scopes up, our scopes also reflect the match. So as we move back and forth, we can see this is great if you wanna do a manual match between the two. And I'm gonna pull her saturation back a little bit because she's just really warm comparatively. Let's go top-bottom. There we go. And I'm gonna go ahead here and just pull back my sats. There, that's feeling a little bit closer. And I can also press this button here, and see, let's do this as a left-right, a before-the-effect and after. And I want you to really see what's going on here. So I can desaturate this, and you can see the difference between the two. So now I finally have some shot matching here in Premiere, and this is also works with a before-and-after with any given effect. This is really nice that your scopes also reflected this. You could have multiple projects opened.
Now, we've had that for a while in Premiere, but a lot of editors don't know about it. I'm gonna go here to editing. I'm going to pull up my projects just a little bit higher here, and I'm gonna go to open, and I'm gonna open a project from my drive. There's a particular project I want, my library project. I often used to work in other tools with multiple projects open, and I would use one project to store things like my music. I would use this project to store all my common elements that I would use. And the problem with having two projects open is if I import things, does it know to go to this project or this project? A lot of Premiere users get frustrated by this. So I'm gonna take my library project. In the bottom left here, there's this little button, a little lock, and I'm gonna lock that. And with this locked, I'm gonna say yes. This is perfect now. Nothing can get modified in this project. It becomes a library where I can use it for other projects. So it can become my master library. You could also use this if you've multiple editors for scenes.
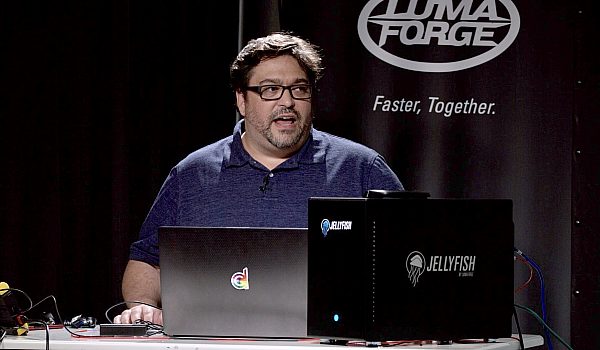
While I haven't gone over this, Premiere on a SAN-based workflow, say a LumaForge jellyfish, there's a way to work with a shared project. And like Avid bin locking, it can do project locking. You can have each scene in its own project. So Premiere is a really robust shared network, capable shared projects, that most people aren't aware that exists in it. Very much Avid-like. I think it's important to mention in here if you're not great with motion graphics, that Adobe's got some MOGRTS, some motion graphic templates. It's called part of the essential graphics panel. I'm gonna go ahead here and go to where it says graphics, and we can lose that for the time being. And I'm just gonna hit the tilde key. I think everybody know at this point, the tilde key goes full screen in the Adobe world. Let's turn off my comparative view. There we go. The tilde key goes full screen. I'm just gonna bring this full screen.
These are all the ones that come for free with Premiere now. These are all the MO-graphs, like lower-thirds and the like. And you can see, you've got a sports scoreboard. You've got a lower-third. You've got a whole bunch of common items. Some of these are animated, but I wanna point out, and I can't get to it right here, it's kind of hidden here, is the word Adobe stock. I'm not online, but if I was, I could from this panel search for other elements I might use. How about a set of bar graphs that are animated, part of Adobe stock? And there's a switch that says free, that you're able to bring these things in free to Premiere. I'm just gonna put in here the word third just so you can see the way one of these work. So I can search through these, and there's a whole bunch of lower-thirds. And we're gonna take one of these and just pull it right on top. And with this open, it pulls any fonts I need if I've got type-kittens running if I've the internet. And then I can go ahead here and hit edit and change this information on her and give her her lower-thirds. This is a big piece of Premiere.
Not enough Premiere users really use all their workspaces, and if you haven't hit the graphics workspace, this essential graphic panel there, it makes your life so much easier. Under the essential audio panel, we have something called ducking. The essential audio panel, again, has been here for about a year. I'm gonna go to a little bit more complex of a timeline. Let's make this a little bit bigger just so you can be a little familiar with my timeline. I happen to have on A1, somebody's speaking. A2, all my nat sound. A3, some sound ambience for the given areas, and on A4, I have my music. I'm gonna take this off of full screen again. I'm gonna switch us over to our audio workspace. And I'm going to say here slash key, so I can see everything. All these elements, these all need to be tagged. Let me clear the audio type. They're gonna be tagged with dialogue. And because they're dialogue, Premiere automatically adds some very intelligent filtering that you can turn on and off. This has been part of Premiere for a year. I can do the same with these pieces of nat sound. I can say they're sound effects, and I can control them quickly and easily with this. It's sort of tagging your media, but down here when I tag my music, something else is gonna happen. So down here, I'm gonna say clear audio type. This is a piece of music. And with it, I can go here to ducking, turn it on, and say will you pay attention to anything that's dialogue? And would you just please automatically duck it for me, generate the key frames? Click, and I'm done. If I'm not happy with that, I can go back and adjust it here or adjust it directly on the timeline.
Once you start using this essential sound panel, it's a whole bunch of very intelligently hooked together effects, that if you're not great with effects for audio, that they're going to go and help you make your audio sound great without being a great audio mixer. They're taking a lot of the intelligence they have from developing a DAW known as Audition, a digital audio workstation. The last thing I wanna talk about is I like painless post, but I can't make moneys. I can make money teaching you great tools. When post is difficult, that's where I become of very high use. I'm a consultant in post workflows. And one of the places aside from education, I look at workflows that get tougher like when we're working with a lot of LUTs, when we're working with VR. I bought this past year a Vive headset, and I've started to do some shooting and work. I've been working in VR for two years, but I bought the headset this year. And I have to actually show you this. I didn't bring the headset with me. I went and recorded my screen, and I'm just gonna show this to you full screen here in a moment.
So let's go ahead. On my left, at home, that's my Premiere screen. And on the right, that's the output of my head-up display. So this is me turning my head. And I'm just gonna shift to a marker here. That is my Vive controller in the head gear. And what I wanna do is I wanna go and have an overlay, and Adobe has given us this sort of really cool overlay here. Right there, that's the overlay. I'm able to actually see the timeline inside of the headset. I can do some basic rudimentary editing if I could feel the keyboard. It's kind of hard to do in VR, to feel the keyboard. But I'm able to soak-back and bring up this little panel, and it's seeing what I'm looking at. And I can actually move the VR space.
And just so you're aware, in VR when you make a cut, a simple cut, you have to make sure that what you're looking at in the first bubble matches what you wanna look at as an item of interest in the second. So just like you would do a match action cut in editorial, in VR editorial, you're trying to line them up, and Premiere has a feature for that. Because of that little panel here, because of this panel, you can see oh, this is where they're looking, and adjust it here. This interactive environment really has improved the immersive technology, the immersive work inside of Premiere Pro. It's a lot of fun. I'm not totally convinced we're gonna be doing tons and tons of films yet in VR. We're still at those very basic days. We're almost at the closeup, wide-shot, medium-shot Eisenstein days, but I'm beginning to see really great content.
As my friend, Lucas Wilson, says, what makes VR so powerful is that you're not watching the piece. You're part of it. It's immersive. And that's what we really want in our storytelling. The closer we are to the action, the more emotive, the more emotion there is. I wanna mention the Editors Retreat. The Editors Retreat is in July this year. We have two keynotes, Norm Hollyn. He's a professor at USC. He cut Heathers, Cotton Club, Wild Palms. We have Kevin Ross, who cut quite a bit of the Stranger Things season one and season two. These keynotes hang out with us. This is a boutique conference. The conference itself only takes about 70 to 80 people. We give everybody a free pass to the education that happens here at NAB at post production world. It's 200 classes. It's worth $1,500. The goodie bag is worth about $4,000. Come to the event. If you have any questions about it, please feel free to reach out to me personally or go to editorsretreat.com. My name is Jeff Greenberg. Thank you so much for letting me here at the suite. What I like to do is I like to help smart people become smarter. Thank you so much for watching.