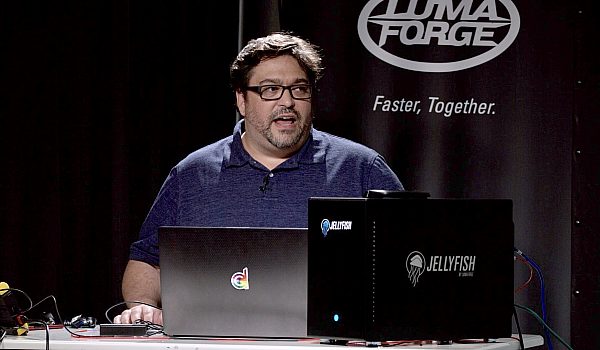
Blackmagic Design has made a lot of changes to DaVinci Resolve since taking it over a few years ago. Trainer Jeff Greenberg provides tips for editing in DaVinci Resolve. Learn some of the coolest features in Resolve. Also discover a few gotchas to avoid when getting started.
You're gonna have splicing, you're gonna have overwrite, you have trim tools. Some things you embrace right away. Some things you don't know they're there. Some things you don't know are a pain point and we're gonna cover about eight great things, and about three things that I just want to warn you about inside of Resolve. And I'm gonna just give you an idea of what we're doing, eight amazing cool things, three little speed bumps. The first thing I wanna mention is it's really free. The $299 does amazingly more but I do know some people. I know quite a number of people who use the free version of Resolve and why you wanna edit in it is because you can take your Final Cut, your Avid, your Premier Keyboard and go.
I use the Resolve keyboard but it's this tool set that we all live and breathe and die for. Because there's a zero conform. You can just switch back and forth, and now you can switch back and forth from Fairlight. I don't even know how, I haven't even seen the new 15 version but all the stuff I'm talking about applies still. It's tracks, conventional interface, zero conform. I'm not gonna talk about the set. I'm not talking about Fairlight. Did I mention the amazing color tools? Just wanna make sure I did. Eight cool things. I've got an interview clip here, and right underneath this little switch, this little tiny switch, it says, Show Full Clip Audio Waveforms and Zoomed Audio Waveforms. Let's do Full Clip Audio Waveforms. Let me clear my ins and outs, and I'd like you to see here, as it's playing, you can see, we're not gonna hear it but you can see what he's saying. And this is what a dream come true for me as an editor, that I don't have to switch back and forth between the interview and the waveform to be able to see what I'm hearing, if you will. We can make our system live save. This is a preference here so I'm gonna go ahead and you should know Macro PC Resolve looks the same. They actually have the preferences underneath a DaVinci Resolve menu. I'm gonna go here to my preferences, under User, and there's the words Auto Save, and now it's live. You'll see it says edited up here. I'm gonna hit save. I'm gonna hit a Command does a Save, or a Control + S on the PC, it goes away. And now Resolve is live-saving as we work. So if it crashes, it's when you're going to lose the last step. You've got crazy, crazy powerful smart bins.
Metadata is the key to life. You right now probably are using a lot of bins and just dragging clips around. If I give this a keyword, a little bit of information, it will auto-build bins for me. I've already got that set here in the bottom left. They're called smart bins. I've got one here set for interviews and one set for B-Roll. I'm gonna open up one. You can see I've got some interview clips that don't belong there, we'll fix those in a second. I'm gonna right-click on the word Interviews. I'm gonna say Edit Smart Bin, and it's saying here, any clip that has a keyword that contains the word interview, automatically ends up in this bin. So I'm gonna go ahead here and grab these four clips and look at their metadata. I need to look for a specific type, it's called shot-in-scene. I'm just gonna scroll, right here where it says keywords. I'm gonna start typing in the word interview. I-N-T, hey, it's typing that in for me. Click. They now have the word interview, when I hit the word save. Just as a little caveat, when you are working in Resolve, and you've got multiple elements selected, a save button will show up. You need to click it in the metadata panel, for you to save that metadata. I'm gonna hit save.
Now, the clips disappeared because this bin says, if it's got the word interview don't go here. And now they're there automatically, and that's the power of metadata. The least sexy thing, becomes such an important thing for organization, in professional post-production. We can sync multi clips at once and you'll notice I got a little thing there. It says, seriously? Yeah. I'm going to do this, a little differently than I normally work. I've got a sync bin here. I've got four clips, I've got three pieces of audio and I'm gonna let Resolve figure it out all at once. Somebody's gonna cry because of this. It's my favorite thing, it's to show you something so cool it makes you cry. I'm gonna lasso all of these clips. I'm going to right click and I'm going to choose here, Auto Sync Based on Waveform. Now, if I did it just based on waveform, I couldn't show you the difference. We wouldn't be able to hear the difference so I make audio plugged in. I don't think you'll see the difference, in the waveforms if I tell it to sync and append those tracks. So that's exactly what I'm gonna do. It's gonna sync. Here we go, and what it's doing is it's looking at the waveforms like a lot of other tools do but I'm doing, multiple clips at once. And when it's done here, I'm gonna tell this tell Resolve to make a timeline of these four clips. So I'm just gonna right-click here and say a New Timeline. New Timeline Using Selected Clips. I'm gonna call this Sync example. I'm gonna say Okay.
Now there are the clips on the timeline. Let's make our timeline area just a little bit larger so you can see this a little bit bigger. I don't need the project for a second so I'm gonna hide the media pool. And you can see right away that there's a difference between the two waveforms. This is the clean audio that I grabbed. I'm sorry, this was the camera sound. This was the clean audio and I could mute these and turn these off. Remember, I said Append to Tracks. Normally you wanna do that. It would just do it for you automatically and it did it for four clips. Even though there was only three pieces of audio, because it could see how those audios overlap correctly. Isn't that crazy cool? You can also do an Edit on Top in Resolve. If you don't remember, there was a tool that we were all using that had Edit on Top, it was called Overlay. I could take my friend's interview here, let's come back to our media pool, let's go to our effect library. Let me actually get rid of the media pool here for a second. There we go. Go to generators. I wanna put a title, I wanna put a piece of text or a lower third on top of him, and so all I'm gonna do is just zoom in a little bit. That's Control or Command + Plus, Control on the PC Command + Plus. I'm gonna mark it with X marks the spot, and in doing so it's ready for my edit, and I'm gonna grab this lower third. I'll take this one, drag it right here, I'm gonna put it on top. One, two, three, done. My text is on top, ready to be tight set up for a lower third. I didn't have to drag it and massage it's edges. I was able to put it exactly where I wanted it. That's what really good editing is. Allows you to be fast and confident about what you're doing.
Something I have never seen any other editor have, is Ripple Overwrite. It's a full point edit that replaces two shots of two different ranks. Let's take a look. I'm gonna switch timelines here and I'm gonna take this first interview clip. I'm gonna mark it with an X to mark this spot. There we go. I'm gonna one of his shots. Right down the in and out of this interview clip is 14 seconds. And the in and out I have set here is, let's make it a little bit shorter. Let's go in and out here. It is nine seconds. I have one, two, three, four points. The way you could do this, is you could extract everything and then push everything back in. I'm gonna go here in Resolve, I'm going to drag this over. I'm going to say Ripple Overwrite, one, two, three. And I put the timeline back. Now it also did some damage here and I could fix that after the fact but it's just this idea that I could swap so quickly different length clips. Not a replace, a Ripple overwrite.
I find myself using this, particularizing my initial string outs of narrative work. When I'm trying to take somebody's longer performance and swap it with their shorter performance. Where it's entirely different performance. And also works great in this situation but if I you have a fairly built up timeline, it's a little to late for you to want to use this. Take selector. Take selector you may I've seen other tools, as sought of ability for you to pick different shots but Resolve has the ability to also make it ripple the timeline. The little switch up here allows you to say ripple the lengths or not. I want you to see how well the speed changes, work in Resolve. I think this may have one of the easiest engines for this. And then there is something special that happens. So I have this shot here of a plane, I'm gonna go ahead and hit a controller or command on a Mac and touch to bring up the Retime controls. And let's do a command plus here or control plus get a little bit closer. I'd like to change the length of this shot so when I go ahead and I drag this shot right now, I'm trimming the shot. If I do it at the top though, I'm changing the speed. Do you see the speed changing right down there? Resolve's trim mode is very very robust. And I can jump in the trim mode with a letter T. Is this button right here.
When I turn on trim mode, I can actually grab this, trim and change the speed at the same time. So this is great when you know you want it to be shorter and you need the timeline to close. You'll the ability to not have to not have to relying on closing it, closing the gap, playing around. You're able to use the trim mode and the difference is letter T, whether you're grabbing or you're grabbing down clip itself. Three things I wanna warn you about coming to Resolve. There are just some speed bumps and I'm trying to do the responsible thing as teacher just to make you aware of them. The first is the file are default in a list view. You have to enable display names to rename a clip. And this feels frustrating if you're used to editing, if you're to that idea that you can just go on and change the name of your clips. You need to know that Resolve isn't like that by default. So I'm gonna go to my B-Roll bin here and I'm gonna change it to a list view. And I can't change these names because they're file names. Do you see right at the top there it says file names. Right at where it says file names, I'm going to right click. I'm gonna say display name and I'm going to uncheck file name. And when I do so this now says display names and now I can click and call them anything I want. This is a much smarter way to work as somebody who does a lot of organization as an editor. But you understand the heritage of Resolve, is Resolve was first a color tool. No colorless in the world changes their audio, changes their clip names. Number two databases not project files. Resolve is not using what you're conventionally used to. A file somewhere on your file system that you go and you grab and you can take with you. It is a database. I need to show you two things, how to export a database if you wanted to give it to somebody else. I need to show you how to backup your database.
So to backup your database from that front window, like project manager or home. We've got a little switch, we turn it on and we say backup the database. Let me show you that. Here I am in Resolve, there is a little home in the bottom right corner. This is also under the file menu, it's called the project manager. And in the project manager, right here is this little switch. This switch brings me my database and this first choice here backs up my database. And i would recommend that you backup on a daily bases, out to some cloud given architecture. And if something would ever go wrong with your system, 'cause you have a backup review media, now you've a backup of all of your projects that are live in Resolve. To backup a specific project by itself, I can right click a project and I can say export or import. And what I'm exporting is a snapshot of that project. It's a DRP a DaVinci Resolve Project.
But there is also a brilliant piece here called archive. And what does archive do? Archive goes and it actually copies your project and all your media to a given spot and restore will bring it back. The very last thing I need to do here, is everything gets conformed. There is a single frame rate per project. If you're used to in a tool, having five different frame rates, five different frame sizes. Resolve can have multiple frame sizes but it only gets one frame rate per project. It's a finishing system. You can have other projects if you needed to conform like that at different speeds. I'm the chair of the Editors Retreat, it's a conference for editors by editors. It's a Bootie conference. We've two key notes this year. Norman Hollyn who is a professor at USC school. He is an editor of Heathers Cotton Club, Wild Palms.
For the last two decades, this man has been more involved with more film editors and probably any other educator. We've Kevin Ross who cut of the first two seasons of Stranger Things. Super nice people. We mingle with them, they hang out with us. They play poker with us. They drink with us. The conversations inside the rooms, are almost as good networking and conversations on the outside. This is my baby. You can find out more about it at editorsretreat.com. You get a free pass to the $1500, worth of training of post production worth, here at NAB for next year and a goodie bag this worth about the entire oven itself. My name is Jeff Greenberg, I'm J Greenberg consulting, I'm Filmgeek on twitter. I can absolutely come out and teach your people my materials . This has been tips for editors switching to Resolve. Thank you so much.


 Mobile
 Tower
Tower
 R24
R24
 Builder
 Manager
 Connect
 Kyno
Kyno
 Media Engine
 Remote Access
 Support
