 Mobile
 Tower
Tower
 R24
R24
 Builder
 Manager
 Connect
 Kyno
Kyno
 Media Engine
 Remote Access
 Support
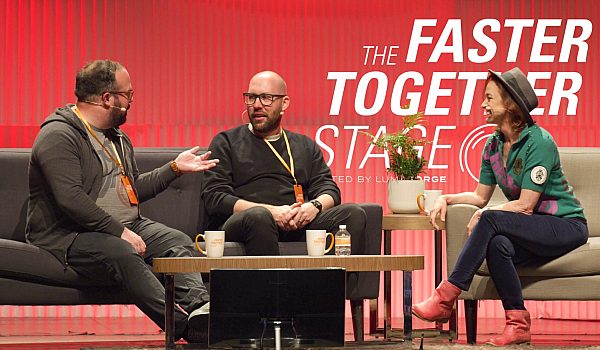
Alexis Van Hurkman demonstrates some jaw-dropping updates within Blackmagic DaVinci Resolve 14 at the LumaForge Faster, Together Stage during NAB 2017.
I’m glad to be here. Um, I'm here showing off DaVinci resolve 14, which we just released the public beta of. You've already read my bio so you know who I am. I worked with the design team but I also use this as an end user. Um, and I'm really excited about a lot of the advances that we've made this year in terms of performance, in terms of new tools for colorists in terms of a lot of refinements for editors. Um, and I'm just going to switch really quickly. We have a Fairlight page, so if you need to do in depth editing, that's something that's being addressed as well. It's very exciting. But I'm going to start off on the edit page and then I'm going to move into the colored page and I just want to take the opportunity to hit a few high points. Um, I talked to people in the field all the time, colleagues, uh, and they always have things that they hit me with.
Like, you know, why can't I have a floating bin full of clips? And one of the big things about this release is that the DaVinci team has really tried to go ahead and knock off as many of those little aggravations as possible. So now you can have as many floating bins as you want. You can have them on a separate window if you want separate a monitor. That's just one of those little things that's literally been one of our most requested items done. Another thing I get a lot is what about JKL performance in Divinci resolve? I wanna I want to do editing, but it feels a little sluggish. Now this video is being mirrored so it's not quite as peppy as I'd like. Um, but even so, uh, if you can listen to the taps, JKL has become incredibly responsive. I can change speeds and the speed chains are instantaneous.
If I switch direction, it just happens. I wouldn't be stuttering if I wasn't mirroring the video here, but these little things are a huge deal. Um, and other improvements as well. For example, uh, people who are fond of using the specialty play commands play around, play in, to out, play to out. Um, I use those, but there are a lot of keyboard shortcuts to remember. So one of the things we decided, uh, is to go ahead and repurpose the forward slash G to be play around selection. Um, so if I have nothing selected and I just press forward slash I'm playing around the position of the playhead, it goes and comes back. But if I decide to go ahead and hit the Viki and select an edit, now I'm playing around that selected edit. If I hit shift the, I select the clip, now I'm playing around the selected clip.
I can play around three selected clips. It's completely contextual. So with one keyboard shortcut, I do pretty much everything I want to do. And those of you who like using dynamic trimming, if I go into dynamic trimming mode, we use the same function. But now as I'm trimming around with J K if I hit the space bar, we go ahead and play around. So basically we're just trying to add the kind of refinements that give editors the fluidity and frankly the enjoyability that they want from the editing process. So I really think editing has become significantly refined in this version. I could keep going on and on and on, but I want to throw colorists some love because we've done a whole lot for colorists. Now if I go into the color page and I look around, it's not immediately obvious what's changed because most of the colorist improvements that we've put in are in the form of resolve effects, which are our plugin format that we use inside DaVinci Resolve.
Um, this particular machine has the stock list. We of course still support third party open effects. So those companies out there that make open effects pleads, uh, keep making more. And if you haven't ported your, your plugins to open effects, it'd be great if you did. I'd love to use them. Um, so I'm going to go ahead and actually press shift F to go into a new expanded viewer mode where now we can show a full column open effects browser, which is pretty convenient. I can actually also open up my note editor in this view. Um, this is a new thing and if I scroll down the list, you can see we've got a ton of affects that ship with the studio version of DaVinci resolve. Many of these are studio only features, but since the price has been lowered to two 99, that's not such a big imposition anymore.
Um, and there are some really good ones in here. Now to give myself bit of a break, uh, I'm gonna go ahead and close this view. Uh, and I'm going to jump back and I'm going to start with something that sometimes colors have to do, sometimes finishing editors have to do, sometimes just editors have to do, uh, and that's stabilization, which individually resolve is found on the color page. So I'm going to jump back to this first clip here. Um, and I'm going to open up the tracking pallet and go to the stabilizer mode. I've already stabilized this, it takes a little bit of time and I wanted to show more features, but now there's a bypass stabilization button that I can press to show you what stabilization, what the pre stabilized look of this clip is. Gonna look like. So if I play through this, you can see that it's pretty crummy.
It's popping, it's jittering up and down. Um, and one of the nice things about the new stabilizer is it's a lot more automatic than the older stabilizer was and it's also a warping stabilizer. So it's able to do some more aggressive things to give you a better result. So if I turn bypass stabilization off, you see I've zoomed in a little bit to get rid of some of the blanking that's introduced by the stabilization. And again, mirroring out is kinda dinging my performance, but you can see the results is significantly smoother. And this was just a test shot for a film I shot recently. It was not supposed to be smooth or usable. I just wanted some quick footage to slap in and see what a composite would look like. But the new stabilizer actually made it completely usable. I was shocked. Um, so it's very nice.
It has multiple modes. If I open up this pop up down here, I can go ahead and calm down perspective and pan tilt, zoom and rotation. If perspective is giving me some trouble because it's a non shot, I can switch to similarity or translation which would go ahead and basically selectively remove a things that resolve is trying to do to stabilize the shot to give you a better result. So you want to start from the top, work your way down until you get the result that you want. Pretty straight forward. Um, another thing, switching back to some hardcore color, uh, DaVinci resolve has had resolved color management for a good long time. Um, we've added something to it. If you look here, uh, in the color management panel, the project settings, we now have applied gamut mapping from timeline to output colored space. It's a little easier for me to demo what's going on if I just go ahead and do this inside of a no tree.
And for that reason, we've got gamut not being available as a plugin. Just like we have color space transform available as a plugin. So if I drop this on this clip right here and I turn on luminance mapping, nothing immediately happens. I'll go ahead and blow this up so you can get a better look at the image. Uh, but if I change how I'm mapping the maximum input luminance, you can see that I'm actually bringing in more detail. So a lot of the stuff that was clipping, it's now smoothly tone mapped into limits. Now this isn't grading the image for you. This is just giving you a tone mapped starting point. So you've got all the image detail you want and now you can start pushing and stretching to create the contrast that you need. Um, if I jump over to another shot, this is, this is kind of an effective one. Um, if I go ahead and turn this up, I double clicked. So you really want to be using a control surface with DaVinci resolve help if I turned it on.
So there you go before and after again, just smoothly integrating all of that clipped image detail into the mid tones so that you can play around with it and get what you need. This is just intended to be a bit of a help. It's nothing you couldn't do manually. Uh, but the nice thing is it spares you from having to be really tricky and selective with curves, which can sometimes be problematic. So I'm going to pop back out and get into some fun stuff. Like so far I've shown a lot of vegetables but I wanna I want to show some dessert. Uh, and one of the desserts that, uh, I've been involved with with the team that's been really fun, uh, is the facial refinement tool. So I'm going to zoom in to this image of me location scouting in Beijing and I'm not maybe looking my best in this shot.
I'll admit it. But it's nice when your also the colorist. So, um, one of the things that's new is we've categorized our resolve affects because there are so many of them. So if I go down here to the refined section, we have the face refinement tool. I'm going to drop that on a note. Um, one other thing I want to throw out at the colorist, let's say, uh, you want to add a resolve effects, but you want to add it as its own node. That's something you can now do. And Oh by the way, notice I've just added a disconnected node without turning off my grade. If you haven't used resolved before, this means nothing to you. If you have used resolve as a colorist, you'll know that now you can start building branches of trees and you don't have to worry about everything turns off until you make the final connection.
So it's all the little things, right? So I've got this set up and all I really need to do to use the face refinement tool is click the analyze button and DaVinci resolve using some pretty advanced technology to automatically find the dominant face in the scene and track it through its full range. So as you see, as I scrub around, it's not just tracking my face but it's tracking my dominant features as well. So I can turn on the mask so you can see what's being found. Um, and I have various controls to adjust the mask size. I can soften the edges if I feel that's something I need to do. So you can refine this automated mass, but you don't have to track it. And the important thing for me with this feature is that typically if you really get into someone's face, and I'm actually gonna make this a little more aggressive around the edges, you typically start drawing a lot of masks and drawing.
A lot of masks can get really old, really fast, especially when you have to track all of them because different parts of the face shift in different ways. So this automatically under the hood applies a bunch of different masks for the overall face, for the eyes, for the lips, for the blush part of the cheeks. Uh, and most importantly to me, separate zones for the forehead, cheek and chin, because faces are rarely a single uniform colors. So maybe you want to introduce some this uniformity or perhaps you want to correct someone's forehead because they've gotten a little too much sun. Their cheeks are a little too ruddy and it's all just built in. So let's start from the top. The thing that everybody wants from a face tool, which is smoothing. Um, and one of my pet peeves is overly smooth faces. It really bugs me when I see someone who just looks like a plastic mask after all the has been done.
And one of the challenges was how can we smooth out details we don't want while preserving details that we do want. And yes, we do want some detail in the face. So we have separate smoothing and detailed sliders. So the first thing I do is set everything to zero. I just want to zero everything out, see what I'm starting with. And yes, I'll admit what I'm starting with is not necessarily that pretty, Oh my God. So what I'm going to do is drag the smoothing slider up until I'm just at the point where I'm doing it. You know, I don't want to do that. That's ridiculous. But I just want to get to the point where I've gotten rid of the detail that I don't want. Um, and by the way, if you drag from the virtual slider in the number area, you get more precision.
So maybe that's where I want to be right now. I go down to the detailed slider, the detailed sliders about reintroducing favorable details. So I want to get rid of the blemishes, but I want to keep the porters. Um, so I'm going to go ahead and dial up detail until I start to get some of that underlying structure of the face back. Right. Can you all see that? I mean it's, and this is a nice example because this is just running gun, you know, cheap footage and it's wiggling all over the place. This is very real world and we're robust enough to keep up with a shot like this. Um, and it's not about beauty. I didn't want this to be called the beauty filter. I wanted it to be called the refinement filter because maybe I wanted to make look more craggy. Everything in here is bi-directional. So I add my detail back. Last thing, I have a detailed size slider which lets me choose the size of structures I'm reintroducing. Now in this image there's pretty much two levels of structures. So this doesn't do a whole lot. But if I do it before and after, wow.
And this isn't noise reduction, this is just playing with detail. Um, so my goal with this filter is for it not to look like you've done any work on the face. It should, if you are gentle with the controls, a, you shouldn't be able to see what you're doing until you do the before and after. And then it's like, ah, okay. That I can see. But wait, there's more. Uh, I can go ahead and scroll down. Now I have an overall colored grading section. Now I can control the contrast of my face. So if I want to flatten myself out a little bit, I can, or if I want to punch myself out of the can, I also have a mid tone slider. So if I want to give my skin a little more luminosity to bring myself out of the background, I can. And again, if I do a little before and after, you can see the difference.
I can color boost or I can desaturation depending on my needs. Again, everything can go in either direction. Um, change the tent if I think I should be a little runnier. All right, now I'm looking a little more healthy. Um, now when you start introducing all these colors, maybe you start introducing too much color in the shadows. So I have a built in desaturation, uh, desaturation shadow slider, so I can go ahead and take some of that saturation out of my beard out of that shadow area so it doesn't start looking like cheap TV. And then finally, I don't have a lot of shine here, but we do have a shine removal tool, which is really nice and gentle. It's not gonna hammer the image. Again, it's all about subtlety for me. Um, and yes, you can turn all these controls to 11, but you can also be very gentle with them.
And that's to me the key. But I haven't even gotten started. So now I want to go ahead and sharpen my eyeline a little bit. I want to go ahead and brighten those eyeballs to bring them out of the shadows. I also have an eye light control that works in both directions. So if I want to go ahead and bring my eyes out from underneath that cap and I don't know how many times I've tracked a window under someone's hat, you know, could you bring a bounce card? No. Um, and then finally I'm looking a little tired. So I have [inaudible] removal built in again before, after. So now I'm looking like I got a full night's sleep, which is uncharacteristic for me. I will assure you, um, you know, I could keep going. There is a lip retouching section. There's a blush retouching section. Um, and blush retouching again works both ways.
If you have an overeager makeup artist who's maybe done a little too much ruse, you can go ahead and dial that down. It's not about adding. Sometimes it's about subtracting. And again, as I mentioned before, separate controls for the forehead, the cheek and the chin. And in fact, if my chin is looking a little too green, I can go ahead and selectively just push that towards red. So this is a really advanced tool, but of course then the real fun is to play through and you see that all of those adjustments have been tracked through the entire range of the image. This isn't an easy shot. It goes out of focus. The camera's wandering around. I'm moving, I'm moving my head from side to side. It has a good range of trackability.
So I also have at my disposal, if I go down to the work section, we now have a point warper built in. If you're a finishing artist, if you're an effects artist, if you're just an editor that needs to do something specific. This is really cool in the way it works is you shift click to add locking points to areas of the picture you don't want to affect. And then you click and drag to warp whatever part of the image you do want to effect. Um, and by the way, I know the, uh, the points are a little bit big by default, but if you open up the onscreen controls, you can go ahead and dial those back. And in fact, there's this really great auto hide control so that as I'm clicking and dragging, I can just focus on the image. Um, and there's a lot you can do with this. You can turn off the corner pinning of the edges of the screen. So if you need to push off that black bar on archival footage, uh, you can go ahead and just stretch that off of the screen and you can define the limit of where the stretching stops. So there's a lot you can do. This was, this was a big, a big ask from the team and they really delivered. So I just wanted to squeeze that in.